Saturday, August 22, 2009

Paverpol, Pottery & Speedball

Another couple of Paverpol models.


The first is a little Tea-Light girl. She wears a little blue dress, blue leggings and has a pink rose in her hair. She carries a Tea-Light held in a basket and sits on a round mirror. Her name is Clara.


The second is Christabel, she sits calm and poised on her plinth. I gave her a dusting of green acrylic paint and then dry brushed her very lightly with gold. It does give her a bronze look.

I was pleased with the way the dress draped both at the front, over her legs and at the back. She needs another coat of varnish and then she can take her place in the garden. (Far away from Bertie, otherwise she will be minus her wooden plinth).


I always find it a problem knowing what I want to achieve when I go to our pottery classes. Sometimes I think my ideas are too complicated and doom myself to failure before I start.

My last project was taken from an item in a ceramics book, it was far more complicated than mine turned out, as the main body of the piece was made from turned clay. As I am no good at throwing pots (only dropping them), I adapted the procedure to produce my Tea Light Castle.

Once it was made and fired I gave it a coat of watered down PVA glue, just to give a good base for the acrylic paint. It was a bit time consuming painting it as it had some fiddly bits to the roof but on the whole I was quite pleased with it and it does look quite nice sitting on the table in the garden with the light coming out of the turrets and the doorway. It did have a nice gargoyle on the top but I am afraid he dropped off in the kiln, may have to get my Fimo out and make another.


I have been watching Barbara Gray on the Create and Craft channel recently as well as our own Lesley demonstrating the Clarity Stamps http://www.graphicus.co.uk/prodsearch.asp?search=clarity+stamps&submit.x=15&submit.y=12 and they have inspired me to have a go. So I bought a Speedball Brayer and using some encaustic card that I already had I locked myself in the kitchen away from the kleptomaniac Bertie. Apart from getting a few lines here and there that I could have done without the result was quite pleasing. The photographs are not very good, they look at though they have a bend in them. I need to take more, the one I was most proud of did not take properly, I will have another go. I am now pestering Lesley to give me a couple of lessons with the brayer.


Monday, July 13, 2009

Graphicus Open Days

We had a fantastic time at the Graphicus Open Day's, 3rd & 4th July. Our theme for the day was American Independence Day which is celebrated every year on the 4th July. We all sought out our cowboy hats. Denise was a real sport, she dressed for the occasion. Apologies to Vicky who looked just as good but couldn't catch her on camera.


We had David lassoed to the kitchen sink (he doesn't mind, really and I have to say he does a splendid job every time) but when we got to the end of the day he let his hair down!

Lots of demonstrations took place throughout the two days and every one had a 'whale' of a time. I thought you may like to see some of the photographs I took of some of the finished items. There were so many great items that I have popped the links in so you can browse as you read.

We had our resident expert Annette using the Cricut Expression, Create and the Slice machine. A cool scrapbook page. http://www.graphicus.co.uk/prodsearch.asp?search=cricut


Lynn got to play with all the Tim Holtz, Heidi Swapp's Mega Masks, Distress Inks to name but a few. Some fabulous tags and art work were created. Go to Lynn's blog to see more of her awe inspiring creations. http://inkyartitude.blogspot.com/

Glenda showcased some of the new A5 stamps and coloured them using the Copic Markers. http://www.graphicus.co.uk/prodsearch.asp?search=copic see them all here. The colours are fantastic and they really do look like prints rather than coloured with markers.

This is from the Seashell Collage A5 unmounted themeplate. http://www.graphicus.co.uk/prodpage.asp?ProdID=2962


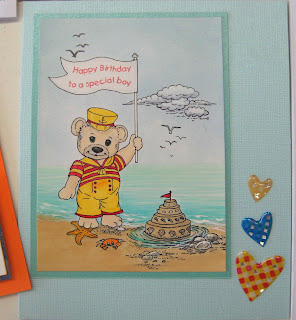
This is Seaside Ted. http://www.graphicus.co.uk/prodpage.asp?ProdID=2963 He really is so cute.

I played with the Melt Pot again, http://www.graphicus.co.uk/prodpage.asp?ProdID=2636 I can't get enough of this and you can produce some really good effects with it. This necklace is made by melting black UTEE with a little white. Take your bead on a headpin and just swirl it around. You can dip it as many times as you like depending on what size you want your finished bead. Then thread onto your chosen material and use any of your other beads to compliment your UTEE creations. http://www.graphicus.co.uk/prodpage.asp?ProdID=1430

The Caterpillar earrings were made using Dew Drops, they come in such a variety of colours that you make them to match any possible colour outfit you may have. http://www.graphicus.co.uk/prodpage.asp?ProdID=2759

Lesley demonstrated Clarity Stamps http://www.graphicus.co.uk/prodsearch.asp?search=clarity+stamps There are some lovely designs and as Lesley demonstrated they flew off the shelf. But never fear another order will be with us over the next few days.


This is the Sketched Lady. She looks really elegant, cool and sophisticated. A nice stamp.


I plagued Lesley for a demo using the Speedball Brayer and an elastic band. I must have a go at this myself. http://www.graphicus.co.uk/prodpage.asp?ProdID=2910 it looked fantastic.


Sunday, May 24, 2009

Arabella

Let me introduce you to Arabella.

Arabella is made from Paverpol, I had seen this demonstrated on Create & Craft a few years ago and thought hmmmm, I could fancy a go at that and then it seemed to disappear and nothing else was said about it.

When we attended the trade show at Birmingham in February we were directly opposite a company called Target International. We got one of their catalogues and there it was. So after a quick Internet search to see who sold it in the UK, I placed my order.

It is a fantastic product, you use 100% natural materials, eg T-shirts, leather, silk etc. You assemble the model around a wire frame which is covered with aluminium foil to pad it out. You then wrap thin strips of material covered in the Paverpol and mummify it. Once dried, this takes about an hour, you can dress it. I had enormous fun doing this, it was lovely and messy. After about five days drying time you can give it two coats of an outdoor varnish and place it in the garden, it is completely weather proof.

I have loads of ideas buzzing around and I have just placed another order with http://www.paverpol-uk.co.uk/ for more. Can't wait until it comes.

Monday, May 11, 2009

Graphicus Open Day's

I had great fun at the Graphicus Open Days last weekend playing with my Melt Pot.

I made a necklace to go with the charm bracelet using a couple of the papers from the Guild pack, one had a golden tone to it, the other black & white. I added some spacer beads from my stash and hey presto! two very wearable necklaces. This technique using paper and wire and dipping it in UTEE was invented by Leandra Franich and is called the 'Leandra Bead'.
http://www.paperartsy.co.uk/blog/2008/12/leandra-bead.html


I changed the chain on the charm bracelet and made one using jump rings, a Byzantine chain with an inter linking ring to hang the charms.


Another Melt Pot item, a Pendant, made simply by pouring the left over UTEE from another project into the pendant casing. It reminds me of a fossil.


This is a clever idea to get rid of any unwanted seed beads. I put four onto a head pin and dipped them twice, added a small bead to the top and then strung them onto a leather thong with a few spacer beads. I also made a pair of earrings exactly the same to match.


This is a double Byzantine chain, linked together with jump rings. With a watch chain to match.


Thursday, April 30, 2009

Crate-a-Pot & Teapotty!

Two projects undertaken at my pottery class.

When it comes to creating an object I can play, play and play. I love to add detail to my objects, whether it is using polymer clay or stoneware. Hence these two. In fact I am sometimes guilty of over detail but with this crate-a-pot, I think I got the balance just right. It is basically just a block of clay spread with a rolled out sheet to represent a table cloth, a vase of flowers was added along with a plate of sandwiches, a teapot and matching cups. A feast for the workers!


Once the glaze is applied, the object comes to life.

A little bit of humour to this one. I wanted it to look like a public loo. I created the block along with the spout and handle and marked the bricks into it. A toilet roll sits on the top ready for use, a huge lump of loo roll is spilling out of the toilet onto the floor.


I have applied the glaze but it does need a firing to give it the shiny glazed look. The wall was done with firebrick red, the toilet will be ivory and the seat grey. The loo rolls will be a creamy colour. I wrote graffiti all over the walls to give it an authentic public loo feel.


I have not seen this teapotty finished as yet. It was fired and put on show in the college with all the others, so I am eager to see exactly how the colours came out. I will post a photo when eventually I get to see it.

Tuesday, April 07, 2009

UTEE Charm Bracelet


This charm bracelet is made from clear UTEE.

I used a few strips of Glenda's paper designs rolled around a cocktail stick. This I dipped and coated with the clear UTEE. I then wrapped wire around the UTEE bead and dipped again. The only thing you have to be careful of, is dipping too much. Wire wrapped beads have a habit of growing too big.


The bead above has a glass pearl inside, dipped and wrapped in wire then dipped again.


I love this manuscript design, the UTEE magnifies the paper and it looks really effective. Some of the beads were dipped once and then quickly dipped in bedazzles, then dipped again, this seals in your embellishments.

Once you have all your beads made, you can add them to your chain and attach a nice fastening. I like to top the bead with a bead cap.

Monday, March 09, 2009

Melting Pot & UTEE

I bought myself a Melting Pot last week, well it was part of my birthday present. I watched all of Suze Weinberg's videos on You Tube to pick up some tips and got down to it.

This was made using clear UTEE and a few drops of alcohol ink. As long as you drop the ink into the UTEE and not straight onto the pan it works well. Thread a bead, I used a plastic silver one onto a head pin. You need to use a good amount of UTEE to enable you to swirl the bead around and get a good coating. Once it has melted drop some of the alcohol ink into the UTEE, gently move it around to mix the colour, don't be too vigorous when you mix it as this can form air bubbles. Take your bead and head pin and swirl it around to give it a good coat, don't worry that it goes up the pin you can cut that off later. You can build up the coats to give you the size of bead you want. I think this had two coats. As you use the UTEE be aware that the colour will dilute, so if you want all the beads the same colour top up the alcohol ink as you go. Once you have all the beads you need you will need to tidy them by cutting around the head pin to round off the bead, use scissors and not wire cutters, otherwise you may cut through the head pin. Use wire cutters to cut through the head pin but leave enough to make a loop to thread onto your necklace. Then all you need is all your other beads and thread to make up your necklace.


The necklace below was made in the same way but using clear and bronze UTEE, then a good amount of black embossing powder. It was very satisfying making this one, it had the consistency of chocolate.

Again it had two coats, the bronze and the black formed some lovely swirls and looks really effective.


Sunday, February 22, 2009

Cheeky Chappie, Sore Feet and Crackling!


This little chappie sat on my wing mirror for quite a while, well, long enough for me to get my camera out of my bag and take the photograph. I had just pulled into the car park at work and he fluttered down for a rest, must have been wanting to warm his feet on the heated mirror! You can just see the reflection of the dashboard in the window.


Trade Show 2009, my feet are just recovering, the photograph below was taken on Saturday, during set up. The stand really did look so good and we had lots of compliments about our jackets. Everyone said how well they looked and how they could pick our stand out from all the others. Even other exhibitors commented.


Lynn's mask was a crowd puller and all the art work was complimented.

Lynn and Helen grab a cuppa and a chat during a lull in activity.


The blue in the jackets was so vibrant, Glenda named us the GLOGGS!


Thought you might like to see an old glass vase I have just revamped. Using Viva Croco Crackling Colour, I am so pleased with the result. If using on glass you first need to give it a coat of the Croco Base Coat transparent, I then used a large paint brush and literally slapped the colour on, I used Platinum. The paint needs to be at least 2mm thick for it to crackle but I gave it an uneven coat which I think added to the overall effect. Once dry I rubbed in some of the Metallic Rub-ons to give it a subtle colour. This colour shines through when a tea light is placed inside. It looks really effective when lit.