Sunday, March 16, 2008

A Bit of Everything

Seems ages since I last blogged, been a bit lazy of late, never mind here is a catch up.

Thank you to everybody who rang to ask how I was after my little accident, I am fine, but the car is a little poorly around her back end but I have her booked in for a little op' so she should be fine and dandy in a few weeks time. I am leaving her in capable hands while Steve and I go wandering around Southern Ireland for a week, no doubt we will do a little Guinness tasting while we are there.

What have I been up to since my last blog. Went to the NEC in Birmingham for the Trade Show, I didn't know my feet could ache so much! ouch. The stand was so colourful, it really did look great. I did enjoy it, it was a completely new experience for me as this is the first one I have attended, it was nice to be able to put faces to names of people that I speak regularly to over the telephone.

Saturday 15th March I went along to one of our Crop Day's and spent a lovely few hours putting together a few scrapbook pages, if you have not been to one I can recommend it. We sat and nattered, drank tea, had a lovely cream cake, courtesy of David, Lesley's husband. I started a scrapbook quite a while ago but I keep putting it to one side for other things but when you attend something like this, it does focus you on your project and you do achieve what you set out to do. I don't profess to be a brilliant scapbooker but I was pleased with the end results.
http://www.graphicus.co.uk/workshops.asp

The Wedding photograph is of my parents, sadly only one person from this happy photo is still alive, one of my Aunts. So instead of it being kept in a shoe box somewhere I especially wanted to include it in my book.

One of my recent projects using the silver clay was a brooch, using the All of a Twitter themeplate. I used the largest single bird on the themeplate, Ermintrude, I think the name suits her very well.


This is a silver bar on a very fine silver chain. I traced the design onto paper and transferred it onto a rubber carving block and carefully carved around the outlines. Simple but effective.
Fridge magnet made using stampbord and Ermintrude from All of a Twitter themeplate, she really does lend herself to some great projects.


I am still attending pottery classes and this is my latest project, a wizard. He is still in his unfired state here.

A friend of ours has just celebrated his 65th birthday and he is a fanatical Everton fan, so I did him a card with an Everton footballer in Fimo clay.




Tuesday, February 05, 2008

Framed and Hung!

At last, the long awaited moment arrived.

The postman delivered the very well wrapped package to work. I have not gone down those stairs so quick since we moved office.

It took me about 15 minutes to unwrap, it was like Christmas all over again. We even had Carrie on the webcam looking in.
The portrait is truly beautiful, the detail is marvellous and she has caught Osker as we remember him. You could almost reach out and stroke him.


Saturday, January 12, 2008

Happy New Year

Hope everyone had a lovely Christmas & New Year.

I just have to share with everyone the progress of a portrait I have commissioned. This is my partners Christmas and Birthday present, although a little late for Christmas but still in plenty of time for his birthday.

Sadly, in September of last year, Osker our rough collie died and we talked of having a portrait done. I spent a week or two looking over the Internet trying to find someone to do this and eventually found Laura up in Edinburgh who's work, to say the least is exceptional.
I will post the finished portrait when I receive it and have it framed.
If you would like to look at Laura's web site the link is below. It is worth checking out. Have a look into the gallery and be amazed at the detail.


We can't wait to see the finished portrait.

I did not get any crafting done over the Christmas Holidays, caught that horrible flu and shivered and ached through the holiday, recovered just in time to go back to work!

I got some lovely pressies from Santa, among them some Silver Art Clay, my daughters could not believe my Christmas present request, a fire brick and blow torch!

I think they thought I had gone a little mad.

I have managed a few pieces but did find it slightly difficult to get into the way of using it. It does dry out fairly quickly, however, a quick wipe with a little water helps but I did find myself rushing and consequently not getting the finish I wanted it but I will keep practising and hopefully get better.


My only other crafting endeavour was covering a book using the Fimo clay.

Because the book is made from chipboard you can cover it and put it into the oven and it will not warp. Now I just have to do something with the inside.


Tuesday, December 18, 2007

Meet Vicky and Harvey

Let me introduce you to Vicky and Harvey.

I was asked to make this piece for a Christmas present and was a little doubtful as to whether I could 'do' the rabbit justice. Thought it might end up looking like something from Wallace & Gromit, the Were-Rabbit, but all in all I am very pleased with it. My new toothbrush suffered though, I could not find anything suitable for the whiskers, so I am now missing a few tufts.

Harvey is a little house rabbit and full of mischief and he loves carrots.

Christmas Baubles and Things

Thought you might like to see the Christmas Bauble I made to hang in my window. This was made from a light weight clay, then painted with Ruby Red Pearly powders, mixed with Pearly gum with a good sprinkle of glitter to give it the rough texture. I used the flourish from the themeplate Holly Flourish stamped into white Fimo and very carefully cut around. The back has the wording 'Deck the Halls with Boughs of Holly', from the same themeplate. Very ornate.

I had to share with you this photograph of my two furry friends. We went to visit friends in Wigan and popped into Southport for a few hours. What a day, the weather was terrible, the rain was persistent to say the very least, the wind howled and we got soaked through, but these two brought a smile to our faces and despite the weather we had a nice weekend.


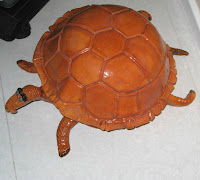
I have been attending pottery classes over the past year and finally came home with a couple of things I liked. Meet Terry the Tortoise and Sammy Snowman, Terry is destined for the garden next summer. Sammy, alas will probably go into the attic for next Christmas, unless I can sneak him into the conservatory! On the other hand he will probably look very fetching sitting on the table in the garden next year when we have that scorching hot summer we deserve. When it gets dark I can light the candle in his tummy.
I have only made a couple of pieces of jewellery over the past couple of months, again using the alcohol inks and silver metal beads, which look very effective when combined with the Fimo beads.


Tuesday, October 09, 2007

Charming!

Charm Necklace

You can really let your imagination run away with you on this one. The clay beads can be decorated in any way you like, some of these have coils wrapped around, others have a pattern made from a very thin roll of clay draped over the bead. Some are from other pieces that I have made, in fact you could use any surplus beads to make this up.

I have included nine hand made beads, along with approximately eight bought ones but the choice is yours. The only thing I found difficult was getting the balance right. My first attempt was top heavy, the second had a gap in the middle but the third, well I quite like it.
The beads are pierced with a head pin, which can be left in place whilst firing. When cool, give them a coat of varnish and let dry. The headpin can be cut to size and twisted around your long nose pliers to give a coil. This is then put onto a jump ring, you can add a few to each ring but I would only fasten a maximum of two large or perhaps one large, two small, as sometimes they can look overloaded. You will need several 7.5mm and 10mm - 12mm jump rings. One of the larger rings is the centre point and the others hang from this.
Once you have made your jewellery you may need a box, especially if you are giving this as a present and the Groovy Duo is great for making very posh boxes. You can colour and embellish them as you like. The one below I made for the Autumn Leaf necklace. It is coloured with the alcohol inks (where would I be without them!), and the leaf pattern is a 10 Second Studio mold, (oh! dear, something else that I have discovered works exceedingly well with clay). Once fired I used the metallic rub-ons to give the colouring.


The molds can be used quite effectively with polymer clay. You need to dust them first with talc (any perfume but I quite like Lavender), roll your clay to the right length and place on top. Lay silicon paper over the clay and press into the mold, if you don't use the paper you will find that it will lift with your fingers and form air bubbles but the paper stops this from happening.

Again using the 10 Second Studio molds. Some lovely metallic effects can be achieved by colouring with the alcohol inks. These are going to be made into book covers, eventually. The 10 Second tools are great too, they allow you to do loads of lovely patterns and intricate designs. I am now drooling over the whole set!


Thursday, October 04, 2007

Stunning Sets and Autumn Leaves

Simply Stunning


Sometimes the inclusion of 'shop bought' beads can add a very nice dimension your work.


This set is made up of beads graduating in size that have been coloured with alcohol inks. A small gunmetal metallic bead has been placed between. It really does look very nice, and very easy to do.

Autumn Leaf

I feel perhaps this is my best piece to date and it came about by chance. Glenda brought back from the States a magazine PolymerCAFE and on the front was a picture of a necklace made from a clay blend, inside it gave details on how to make the blend etc and stringing instructions. I am not quite into following instructions to the letter, so decided to make my own version. I sat watching Coronation Street (sad, I know), whilst rolling 60 - 70 small gold beads and putting holes in them using a meat skewer. I next raided three different sized leaves from the Clematis growing on our fence. These were imprinted into the conditioned clay, using a rolling pin to make sure all the veins were defined and cut out using a craft knife. A small hole was pierced into the top of each leaf just large enough to take a jump ring. Everything was then fired.

I coloured the leaves using the alcohol ink, trying to achieve the autumn colours, a drop of blending solution was applied to the points of the leaves, this lightens the colour and gives the leaf a slightly withered look, the beads and the leaves were then given a coat of varnish. (If you are using alcohol ink and you decide to varnish, use a water based varnish, don't use gloss it will take off the colour). A jump ring was then fastened to each leaf.

The necklace was then strung, using the gold and some small bought wooden beads. The leaves hang really nicely, just overlapping when it is worn.


Think I will have to make another, for myself ...........


Sunday, September 16, 2007

Beads & Alcohol Inks

What a fantastic effect this gives. The beads are made from translucent white Fimo, rolled to the required size and fired. I usually spike the bead on a cocktail stick so it is easier to hold and have to hand a piece of polystyrene to stick this into to dry. Load your felt applicator with your choice of colours and away you go. Just dab the bead. You will find that the ink will form it's own veins. I then dribbled a small amount of the copper mixative and gave the cocktail stick a quick swirl and hey presto! this is the result. You can see the fine veins on the close up, they look rather like marbles. The colours are not done justice in the photograph, they are very vibrant.


Again the bars were made with translucent white Fimo and coloured.
These pieces are not varnished, they have a natural lustre.


Wednesday, September 12, 2007

Feathers, Glitter and Paint

Feather Blend

Made by feathering your sections of clay with a cocktail stick and cutting into triangles, rolling from the widest section as seen below.


Three different sized beads were used in the necklace. The larger rolled triangle, a small round and a tube. Alternating the beads as they were threaded.

One of the more complicated sets I have made contains black acrylic paint, silver leaf and glitter.

This also has a very pleasing texture. Made using layers, one of which was covered with the paint, another with the glitter and another with the silver leaf. It was then compressed and sliced and used to make the necklace and the charm bracelet. The photograph does not do this justice, it really does glitter and catch the light.


Paint is a very good medium for Fimo Clay. I have used the Stewart Gill Metallica paint on unbaked clay, in a swirling pattern using varies colours. Once baked a coat of varnish was applied to protect the piece. A very nice effect.

Don't be frightened to try different mediums with the clay, you will be surprised at some of the effects you can achieve.


Wednesday, July 25, 2007

Polymer Clay Mosaics

Gold Mosaic Pendant

This does look rather good and is very easy to make. Choose your colours, maximum four, otherwise it gets too busy. If you are only making one to two pendants then half a block of each colour should be sufficient. Condition your clay and roll into little fat individual sausages. You then need to choose a 'grout' colour. This is usually, white, silver, grey or for the daring, black. A pasta maker is very handy at this stage, it ensures all your grout is of a uniform thickness. Pass the grout colour through the pasta machine, firstly on a wide setting and then on a narrow and cover your sausages (not then ends). When they are all covered place together and roll to form one large sausage. Now, this is the fun bit. Stand your roll on end and cut through two large areas of colour, from top to bottom. Cover one of the exposed areas with your grout colour, trim and smooth the edges. Now you need to turn this section around and place against your other cut side of clay (the colours should not match as they did before you cut them). You need to do this at least 4-5 times, always varying the way you put the colours back together. Once you have achieved the variation you want, roll gently, be careful not to squash the colours. The next step is to lengthen the roll. Hold it in the middle using your thumb and index finger, gently squash and turn, working your way to the top. Turn it around and repeat the procedure, working your way to the other end. Both ends should now be slightly bulbous. Using your thumbs and index fingers gently squash the end so they are in line with the rest of your roll. Do not squash the roll smaller than you need to, have your project in mind during this procedure, if it is too narrow you will have difficulty covering your pendant. Cut the length into four equal parts and put together again, roll these gently to adhere all the clay, gently, very gently lengthening it as you go. Now cut a slice and look at the effect you have achieved. Good isn't it. You can use this to cover any of your projects.

This piece has been made in exactly the same way. The first four sausages were made using translucent white clay each tinted with a small piece of coloured clay. Scrap clay was used for the bulk of the heart, this was then covered with gold and copper leaf. Very thin slices were taken from the roll and smoothed over the top. Once fired, this was very gently sanded with 1000 grade sand paper and washed in soapy water, this allows more of the leafing to show through, and lastly given a coat of poly clay varnish. Very effective.

The fastenings for the pendants are an alternative to using findings. One part is a square bead with two holes going straight through, the other is a round bead with one hole. The idea is your cord pulls to form a noose to capture the bead, so forming the fastening. Superglue is wonderful for fastening cord to clay. I think I prefer this on a chunky pendant to the usual jewellery findings.


The bracelet is made from large and small oval slices from the same mosaic. Holes were pushed through and then threaded with elastic.


The Double Heart Pendant is a squashed bit of the mosaic simply cut with a heart cutter and a smaller heart laid on top before firing. The colours have a lovely way of blending together and no two will ever turn out exactly the same, you will always find a small variation.